Thursday, December 29, 2011

Resolutions

NYE 2010 @ Friend's house
So, I'm not one to make a lot of resolutions.  I set goals throughout the year, and once something is accomplished, I make another.  I don't think it's practical to make resolutions for the next 12 months of your life to share with the world on one crazy (often alcohol-induced) night.  BUT, I found these 10 resolutions posted on the Scrapbook Expo's Facebook page, and had to share!  These resolutions totally feed into everyone's scrapbook addition.  Enjoy! 
Top 10 New Year's Resolutions

1. Spend more time with the family  and friends- more pictures to scrapbook!
2. Get more exercise - Deep knee bends while picking up dropped brads and buttons from the scrap room floor!
3. Give up drinking, at least for the first week of January - Spills and scrapbooks don’t mix!
...
4. Get out of debt- so you can buy more scrapbook supplies!
5. Learn a new skill or take up a new hobby - scrapbooking DUH!
6. Put something back into the community - help others learn to scrapbook!
7. Get organized - clean scrapbook room you’ll find a lot of hidden treasures there!
8. Become more security conscious - lock those permanent ink pads in a special place. Permanent ink and kids uh-oh!
9. Start  (or religiously maintain) a journal or blog - Best place to showcase your beautiful work!
10. Give up a bad habit - replace with scrapbooking!
~Hoppy Crafting!

Sunday, December 25, 2011

Merry Christmas!


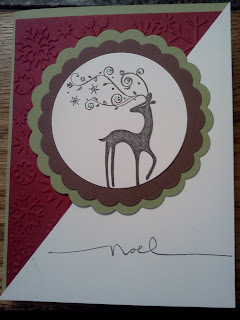
Merry Christmas one and all!  I hope everyone has a wonderful Christmas together.   Here are some cards that I made using Stampin' Up "Many Merry Messages" and "Dasher" stamp sets, as well as "Petals-A-Plenty" embossing folder from SU (and Snowflakes from Cutttlebug), and some Lifestyle Crafts "Nesting Scallops" dies.  ~Hoppy Crafting!


Sunday, December 18, 2011

Christmas Treat Bags

The other day I ended up making around 70 of these fun little treat bags.  In a prior post, I had started this project, by stamping the "VERY MERRY Christmas" from the Stampin' Up set "It's a Wrap Holidays".  I only got about 60 candies stamped and wrapped before running out of candy.  The project was put on hold for over a week, until I could make a Costco run and get the huge bag of Hershey's Nuggets. 
Once I had more "nuggets", I began stamping and wrapped a ton more!  To make the use of "It's a Wrap Holidays" easier, I stamped onto address labels and then peeled to stick to each candy.  After finishing the candies, I worked at getting four into each of the small Stampin' Up treat bags, and then worked on stamping "Joy at Christmas" from the SU set "Perfect Punches".  I also punched a background for each stamped image.  I used  the 1 3/4" and 2" scallop circle punches. 
For the wrap across the tops, I cut a 3" by 6" strip of cardstock, punched the bottom of each with Martha Stewart's snowflake border punch, then folded in half and stapled once in the center.  I made sure to staple backwards so that I could "hide" the staple edges with the scallop medallions I had made.  I love how these turned out!  For colors, I used several greens and reds (both SU and other brands).  ~Hoppy crafting!!!

Tuesday, December 6, 2011

Very Merry Chocolate!


I've been crazy-busy (with nearly 50 kinders!), and have been working a TON!  It has been report card season, and I've been burning the midnight oil at school (Not joking! Some nights I've been there til 8pm!), while doing some crazy projects for my kinders.  I've had limited scrap time, but have been making a few projects, just haven't had time to post.  I don't know about you all, but (just between us, wink, wink), I still have NOT finished my Christmas cards!!! (GASP!)  I have a weekend coming, and I must become a Christmas card mass-production specialist!!! 
Anyways, on to my newest glimmer of craftiness!  I bought a cute set of stamps from Stampin' Up, called "It's a Wrap Holidays".  Wellllll.......long story short, a light bulb clicked on (Okay, it was more like fireworks going off in my head...in a "hey, Genius, why haven't you realized this?" sort of way, but  I digress...).  I looked at my stamp set, and realized that it should fit on address labels!!! YESSSSSS!!! No cutting!  No gluing!  No swearing!  So, I got out my Avery Address labels (30 on a page.  # 48260 for all you tech-savvy crafting gurus), and started stamping away with the stamp that says "VERY MERRY Christmas". 
I stamped labels in Cranberry Crisp, Real Red, Cherry Cobbler, Glorious Green, Wild Wasabi, and Garden Green, then I found what was left of the bag of Hershey's Nuggets and wrapped 60 of these darlings!  I originally bought a bag of Hershey's Miniatures, which subsequently got eaten by a madman and two weenie-wolves, but they are just a little bit the wrong size (too long).   I need to get back to stamping and back to the store!  I intend on distributing the contraband sharing the chocolate goodies as a holiday treat with my co-workers next week!  Nothing says Christmas, like chocolate!  ~Hoppy Crafting!!!

Sunday, November 13, 2011

Happy Birthday, Brenda!!!


My dear friend, Brenda, just had her birthday, and this is the card that I made her!  I used a dark brown card base and liked the inside with white cardstock.  I punched the edge and then inked it using SU Early Espresso.  Next, I cut a green mat and wrapped some gorgeous "pink sorbet" bakers twine from The Twinery around the card five times (taping in the back).
I cut a "pocket" from pink cardstock and stamped a filigre pattern on it with SU Pixie Pink, then glued down.  I then added bling to strategic points across the pocket. and cut a piece of white cardstock to fit inside the pocket.  I rounded the corners of the white paper, inked the edges, and stamped a lighter pink background, using the same filigre pattern.  I stamped and punched a tab, using the SU tab punch and pink zebra paper, then adhered it to the top of the white paper.  I added "happy birthday" in SU Early Espresso, along with several phrases that my friend uses often, from some Pink By Design stamps, in the SU Pixie Pink. 
Finally, I made a cute paper flower using a brad and three patterned papers, which were squares (3x3, 2x2, and 1x1).  I used the torn paper technique and tore each square towards me in a circle.  I then crunched each layer, one-by-one, in my hand until I was satisfied with the dimension of each.  Then I used my paper piercer and mat to punch a hole through the middle and add the brown spiral brad.  I adhered the dimensional flower using glue dots, across the twine.  ~Hoppy Crafting!!!
Pink By Design stamps!

Saturday, November 12, 2011

CKC 2011

Scrapbook Survivors around 5pm! (Cindy, Lynda, Terri, Kelly).

Woo whooo!!!  It's finally CKC time!!!  Several friends and I attended the Creating Keepsakes Convention near Seattle yesterday, and had a total blast!  Some of us took classes, while others shopped the vendor faire.  Kelly and I carpooled and spent the ENTIRE DAY at the convention.  We met up with Kate and her sister-in-law.  I also saw friends and fellow crafters Terri and Lynda.  I know our stampin' friend Deb was there, but we were so busy shopping and taking classes, that we never saw her! 

Kate and I took "The latest and greatest with Basic Grey, Simple Stories, and Crate Paper", and enjoyed a FAST-PACED class.  We nearly completed 4 pages, and have extra supplies to finish more.  The rest of the day we shopped, grabbed a little lunch, shopped, shopped, and shopped some more! 

I found some neat stamps at Technique Tuesday and The Stamps of Life.  I enjoyed some make and takes, and shopping at Embellish It and Queen & Co.  I even found some major deals at Scrapbuck and Scrap Mart.  Can you imagine 2 packages of cookie-cutter dies by Quic-Kutz for only $10, total (I saw each clearanced out online for $11 apiece)?   Or, getting 100 yards of grosgrain or sheer ribbon for only $2-$4???  I also got a grab-bag of bling for $2.99, which should last me for quite some time!

If you ever have the chance to go to a scrapbook expo, I definitely would recommend it!  It's a fun day for all, and you may just find a few things that you may not normally find in your LSS (local scrapbook stores).  ~Hoppy Crafting!!!

Monday, November 7, 2011

Gobble, Gobble!


It's turkey time already (well, almost)!  I finally had some open time to really work on a project, and ended up making 20 of these adorable Thanksgiving cards!  I saw a similar turkey a couple of weeks ago at my Stampin' friend, Deb's party, and really wanted to scrap-lift it!  I used quite an array of punches during this project, as well as Twinery twine, my Cricut, Stampin' Up ink, and foam adhesive.  I think it would be easier to put into a list everything I used, so here it goes!  :o)

*Stampin' Up Owl punch (eyes, body)
*Stampin' Up Butterfly punch (feathers & wings-cut in half and apart)
*Stampin' Up 1" Square punch (behind turkeys for support)
*Stampin' Up XL Oval-2" x 1 3/8" punch (behind sentiment)
*Stampin' Up Scallop Oval  punch(for sentiment)
*EK Success Arch Scallop (border)
*EK Success Card Suits (waddle)
*Stampin' Up "Holiday Best" stamp set (sentiment)
*Stampin' Up Pumpkin Pie ink
*Stampin' Up Early Espresso ink
*The Twinery "Lemondrop" twine
*Cricut Savory Cartridge (plates)
*"Party-Celebrate" paper from Fancy Pants Designs (background behind turkeys)
*DCWV textured cardstock (card bases)
*Buttons
*Foam adhesive (pop up sentiment and turkeys)

I punched everything, then assembled each part mass-production style (all hats, all eyes, all turkeys, etc), until every last part was finished and I ended up with 20 pieces of art!  I had to add some humor and put each turkey on a dinner plate, haha!  The only thing I did differently, was how I added the twine.  On some cards, the twine is wrapped several times from left to right.  On others, it is looped behind the top left corners, then threaded through buttons and finished in a bow.  Hope you like these as much as I do!  ~Hoppy Crafting!!!
Turkey Army!!!

Saturday, November 5, 2011

It's all about the tools....and how you use them!


Today, I have been diligently working on some Thanksgiving cards.  I saw this super-cute idea while I was at a Stampin' Up party at Deb's, and had to see if I could scrap-lift it!  :o)

As I busily began cutting, punching, scoring, assembling, etc., the tools I was using really started to add up, and I felt like they needed their own post.  It's hard to pick ONE favorite tool, but I would have to say that definitely my MOST USED tool is my guillotine-style paper cutter.  I gave up the notion that one of the "travel" paper cutters would be my best friend a long time ago, especially since I work in a school, and use the guillotine-style ones all the time.  I LOVE them!!!  My husband bought me mine for my birthday,about 9 years ago, and it's heavy-duty and going strong (yes, he looked at me like I was crazy then, and asked if I didn't want something prettier.  LOL)!

Another favorite tool of mine is the Martha Stewart Score Board.  This handy tool allows you to score cards, projects, envelopes, etc. (pretty much anything you want to make), with ease! 

Today, I happened to be using the Stampin' Up Owl and Butterfly punches, along with two other EK Success border punches, a Stampin' Up ink pad with sponge (to add soft brown to the project), the Xyron sticker-maker (adhesive), reverse tweezers, regular wet and dry adhesives, and a white uni-ball pen to add accents.

Because I knew that I was making around 20 of these cards, I rummaged the kitchen, and found my neat square divided tray, so that I could punch, assemble and organize everything instead of having a mess on my table and searching for pieces later.  I would really recommend some kind of tray or divided storage when working on mass-production projects to keep everything where it needs to be. 
Hope you enjoy your tools as much as I do!  Crafting really IS all about the cool tools, even though they rarely get the spotlight. I can't wait to share what all these fun pieces turned into!  :o)  ~Hoppy Crafting!!!

Thursday, November 3, 2011

It's for the birds!


Here's another pheasant card using the Stampin' Up "Autumn Days" stamp set.  I used a "fall" colored theme, with yellows, reds, and browns.  The patterned cardstock is from K & Company, which I used an EK Success edger punch to create the notebook page look.
The pheasant is stamped is SU Chocolate Chip, and the leaves in the background are in SU Early Espresso.  I also sponged the scalloped oval with Early Espresso.  I used some gorgeous brown and white twine around a corner-rounded mat.  Finally, I added the pheasant with pop dots, and added bling for it's eye.  ~Hoppy crafting!!!

Wednesday, November 2, 2011

Happy Birthday, Lisa!


Today is my friend Lisa's birthday, so I made a little card for her.  :o)  I used some pink, brown, and tan cardstock for the base and layers of this card.  I also used the Stampin' Up "Dreams du Jour" set for the sentiment, butterflies on the brown paper, and the "dream" embellishment.  Before adding the top layers, I embossed the tan paper, then spritzed each layer with Tsukineko silver spritzer to add glimmer.  I also used the Fleur de Lis edger punch from EK Success along the top of the faux ribbon.  I popped up the brown faux ribbon, the sentiment, and the embellishment/dangle with foam adhesive, and added light pink ribbon and twine.  Finally, I added color using my Zig markers and sponged the sentiment with SU Early Espresso ink.  ~Hoppy Crafting!

Tuesday, November 1, 2011

Fall Pheasant


I have a friend whose family it TOTALLY into pheasants.  A stampin' friend of mine graciously allowed me to borrow her Stampin' Up "Autumn Days" stamp set to create some cards, and here's one!  I used the pheasant, wheat, and some light green satin ribbon, along with some fall-themed K&Company paper.  On the fall paper and around the pheasant, I distressed and inked all the edges.  ~Hoppy Crafting!

Trick or Treat!


Happy Halloween!  I made this fun little Halloween card using the Cricut Happy Hauntings cartridge for the jack-o-lantern, the Martha Stewart "Drippy Goo" punch, the "Wavy Circle" punch, and a $$ stamp from a local craft store.  ~Hoppy Crafting!

Thursday, October 20, 2011

Birthday Surprises!

Today is my birthday, and I felt very special on this day!  Not only did I have many friends wishing me happy birthday, sending cards and other goodies my way, as well as my students being super excited that yes, their teacher has birthdays, too, but I had some other amazing things happen.  I first noticed something was up, when I walked out my front door this morning to find a green blinged envelope and cupcakes with flowers and numbers heading down my walkway!  The special card told me that I would be receiving quite a few surprises today! 

Each of the gorgeously decorated flowers had a number and a "reason why I am wonderful, exceptional, and so very loved" from my very special friend, Brenda!  I am SO lucky to have such an amazing and thoughtful friend!  She managed to get so many people at my school to randomly deliver and/or "hide" cupcakes in my classroom at random times, that my students and I had to keep our eyes sharp for the next arrival!  Each time we re-entered the room, I would hear shouts of  "I see another cupcake!" or "there it is!".  It was almost a game of "Where's Waldo"! 

Towards the end of our day, I had almost 30 cupcakes with flowers, and it was time to share the cupcakes with my kinders!  They had been "tortured" and "starved for sugar" all day (according to them), and were thrilled that I shared!  (As if I could, or would, eat over 30 cupcakes myself!)  :o) 

Though I LOVED each thoughtful gift, and more than a few made me giggle and almost cry, here are some of my favorite "reasons" on the flowers:  Craft Cave; You love when I sing Disney songs; You can hold it together in front of 25+ midgets; you shake the minds of our future serial murderers; you make amazing fudge (almost as good as Martha, haha!); you nearly always have green toe nails; frogs; you are unbelievably patient; you never give store-bought cards; your cellphone "ribbits"; you're always willing to hear your friends vent...no matter what you have on your plate; you make me feel sane when the rest of the world thinks I am crazy;  and,  you are a craft queen!  ~Hoppy Crafting!

Monday, October 17, 2011

Trick or Treat! Smell my feet.....


I LOVE fall, it's my favorite season of the entire year!  With fall, comes jack-o'-lanterns and other spooky fare for Halloween.  I whipped up these fun treat bags with some very simple ingredients!  I used notepads that I bought from the $ section at our local Ben Franklin's, and put each one in a small cello bag from Stampin' Up.  I used some awesome purple & black, and orange & black striped paper from a scrap stack, which I cut into a couple of different designs using the "oblong" option on the Cricut Elegant Edges cartridge (5.76"), then folded in half and stapled backwards onto the bags. 

Before stapling the paper, I tried using a trick a friend of mine had shared to seal each bag.  I know there's no candy in these bags, but I wanted to try out her trick, and perfect it, sooooo....I warmed up my trusty flat iron (yes, a hair straightener!!!), and lightly crimped the top of a bag.  The first bag was a total disaster!  Even though I only touched it for a split second, my flat iron was OBVIOUSLY too hot!  I unplugged it, and tried again a few seconds later with another bag.  This time it was WAY better!  By the last of the 10 little treat bags, my flat iron was cool enough to simply seal and not make any plastic shrivel.  Yea!

Now, onto the rest of the bags!  After sealing, I finished the stapling (again, reverse stapling so that you can hide all the sharp spots with decorations).  I was ready for a little blood!  No, not REAL blood, but the Martha Stewart Drippy Goo punch has got to be one of my all-time favorite punches!  I adhered a red drippy goo strip to the top of each bag for add some spookiness!

Next, I stamped "Trick Or Treat" using a $ stamp from Michael's.  Then, I punched each out, using the EK Success Wavy Circle punch, and inked each with SU Basic Black.  I also added dimensionals to the back and stuck them on to hide one of the staples. 

Finally, I could focus on the pumpkins!  I used the Happy Hauntings Cricut cartridge, and cut out some ghoulish jack-o-lanterns!  I layered each pumpkin with a green base, then yellow, then an orange glitter paper.  I love how they turned out!  I also love the DCWV glitter paper!  It cuts beautifully in my Cricut, and doesn't leave glitter residue everywhere!  After they were all assembled, I added dimensionals and stuck them onto each topper to hide the other staple.  Now all that's left to do, is to add names, and away they go!  ~Hoppy Crafting!

Sunday, October 16, 2011

Pen Surprises!

I got these awesome 1"x8" cellophane bags from the Stampin' Up mini catalog, and just could not wait to use them, so I decided to make a pick-me-up for some of my co-workers!  I found some cute pens at a local store, and even though I didn't even try to match with the papers, no one seemed to care.  I wanted to use some of my Teresa Collins paper that I had gotten a REALLY GREAT DEAL on at www.scrapbooksteals.com
I digress, but, I kid you not, I got a stack of Halloween, Thanksgiving, and Christmas Teresa Collins paper for around 75% off!!!!  I have a couple of mini-albums and another little project in the works using the paper, but I really wanted something for NOW! 
I used a gorgeous orange patterned cardstock, cut in 3"x6" strips, so folded in half it would be 3" squares.  I backwards stapled each to the top of each cello bag (so that the prongs would be covered when I added the scallop and postage stamp, both SU punches).  Then I threaded some Lemondrop twine from The Twinery (www.thetwinery.com) through the top and tied a bow so I could strategically hang them at people's desks.  The stamp is from a SU hostess set, "Cute by the Inch", stamped in Early Espresso, and I added bling.  I also rounded the bottom corners of each to give a softer look, overall.  ~Hoppy Crafting!

Saturday, October 15, 2011

Scored Thank you

Hi!  Today I whipped up a thank you card for a friend of mine, using some Teresa Collins paper and regular orange cardstock.  I started with an orange textured cardstock base in an A2 size card.  I had an 8" strip of Teresa Collins paper left from another project, and decided to use my Martha Stewart Scoreboard (yes, evil Martha...it's a love/hate relationship), to add some fold lines and give the look of using a wide strip of ribbon.  I placed adhesive on both sides of each fold so that it would stay in place, and then added an orange brad in the left corner and some gorgeous Twinery twine around it!  After adhering the whole piece, I stamped "thanks so much" from Stampin' Up's "Curvy Verses" onto orange cardstock, and cut it into a little banner.  I then inked the edges with Early Espresso, popped it up with dimensionals, and gave it a "V" ribbon-esque ending.  On the flower, I added an orange piece of bling.  ~Hoppy Crafting!

Friday, October 14, 2011

Hammered!

I know it has been quite some time since I have posted.  It's sometimes a fact of life, that things can just get away from you and you become so incredibly busy, that there is no time left to enjoy or share the projects that are keeping you sane!
I hope to get back to posting more regularly!  My husband had surgery, school started again, and my husband FINALLY returned to work just a couple of weeks ago (after being out since April!).  My school has been SUPER crazy this year!  I'm a kindergarten teacher, and I not only had to move classrooms over the summer, but started a new schedule, AND we've been overloaded with TWENTY-SEVEN 5-year-olds in each class for over a month (that's 54 kids I have!!!)!  We just finally hired a new section of kinder, and most of our kids have moved over to get our class sizes down to acceptable levels.  I would say it's smooth sailing for a while, but with tons of assessments left to finish (I still have 45 kiddos), and conferences a week away, I fear that, sans tonight, I will have little time for blogging.  The pic kinda shows how all the kinder teachers have been feeling at my school with these incredibly high numbers!  I know "hammered" gives a different connotation, but we've been through a brutal battle of 5-year-old midget alligator invasion! BTW-Midget Alligators are my affectionate name for my kinders.
~Hoppy crafting!

Thursday, August 11, 2011

Twine Crazy!

Left ring: Twinery twine   Right ring: SU, Boxer, Pink Paislee-House of Three twine


I must admit, the twine craze has hit me, and, over the past few months, I've gone a little "twine crazy"!  I love the look on my cards and layouts, and twine is SO versatile, you can use it almost anywhere!  Through the March Shop Hop, Expos, and just browsing, I have come up with quite an assortment of twine.  I also recently ordered the "sampler" from The Twinery (www.thetwinery.com), and split it with a friend. 
My biggest concern with the twine, was how to organize and store it, so that it could be used efficiently.  I got out my embroidery floss, and found some of my flat bobbins and started winding!  I quickly ran out, and had to run to my local JoAnn's Fabric, where I discovered they had a package of 28 bobbins with a 2 1/2" metal ring.  PERFECT!  I could hang the assortment from on of the old shower hooks I have on my metal shelving!  I bought a package for just under $2, and finished my organization!  Now my twine is all accessible and visible so that I can coordinate with any project!  Anyone need some twine?  Lol!  ~Hoppy Crafting!

Tuesday, August 2, 2011

Prep


Today my husband is having surgery, and I remember how incredibly BORED and UNDER PREPARED I was the last time he had a surgery......Sooooo, I spent a few hours preparing some scrapbook/card projects to work on during the wait.  Hopefully you all saw the Advent Calendar from The Scrap Yard Chicks that I posted a few days ago.  I also bought another kit from them, in preparation of the upcoming surgery. 
I did all the cutting and laid all the pieces out that go with each page. (Using separate plastic bags for each set of pages with their embellishments.)  I made a list of tools and inks I would need, and it is all neatly packed in my rolling tote, hospital bound.  (Hope I didn't forget anything!)  I also ended up prepping 16 cards. Yes, 16!  I made sure all the pieces were cut for each card, then slipped them inside of the card base, and into each envelope.  Voila!  Instant project in a package!  I even remembered to add an extra roll of ATG adhesive....I think I may need it! 
Here's to hoping all that prep didn't go to waste (and, of course, that the surgery goes well!)!  I guess we'll see if I actually have the time to work on things....I know my mother-in-law will be there too.  I warned her I was bringing projects.  ~Hoppy Crafting

Sunday, July 31, 2011

Birdie "Hi"

Here's another card, using the Basic Grey "Sweet Threads" collection.  This one uses two layers of coordinating paper, rounded on the edges, along with a diamond cardstock accent.  I love the chipboard bird!  ~Hoppy Crafting!

Tree Thank You


I am really loving the Basic Grey "Sweet Threads" collection!  The paper is so versatile, and a wonderful "blank" canvas to create on.  Here's a tree thank you card created with cardstock elements and rub-ons.  Hope you like it!  ~Hoppy Crafting!

Christmas in July

A few weeks ago, at the Scrapbook Expo, I visited The Scrap Yard Chicks (www.scrapyardchicks.com), and found a Christmas Advent Calendar Kit.  I'm normally not much of a kit person, but over the past couple of years, I have bought several kits from these gals.  They are awesome!  They usually come with all of the pieces needed to create your project (minus glue, ink, other basic tools, etc.), and very detailed instructions with color photos.  During the previous years' expo, they were selling an advent calendar, and I kicked myself for not getting to their booth sooner (because I was sold out!), so the Chicks were one of the first booths I visited to get the best selection. 
Well, I finally got some time (and motivation) to start working on the calendar.  The calendar was actually very easy, just time consuming with all of the little pieces (which I enjoy).  I started by sorting all the pieces into each quadrant of the cookie sheet for each day, just to make sure I had everything, then started with the ones I thought looked the easiest. :o)  Yes, there are fabulous instructions, but I totally winged it with most of them and just glanced at what they should look like. 
Now, I'm done with all 25 days of Christmas.  All the glittering is finished.  The dimensional glaze for the snow globe is dry.  All magnets are on.  I just need to finish adhering the title, and I'm home free.  Pretty cool, eh?   ~Hoppy Crafting! 

A little Bird Told Me...


This card is from the  We R  Memory Keepers Retro Glam line.  I used a rub-on that says: "A little bird told me it's someone's...", then finished "birthday" off with chipboard letters.  I added a chipboard bird, some bling, and pink borders, and this card is finished!  ~Hoppy Crafting!

Great Friends


This is a We R Memory Keepers card, made from the Retro Glam line. I love the mixture of chipboard and cardstock flower elements to give dimension.   I also love the sentiment, which is a rub-on: "Truly great friends are hard to find, difficult to leave, and impossible to forget."  ~Hoppy Crafting!

Thursday, July 28, 2011

Birthday Girl!


At the end of June, we were invited to a dog birthday party, YES, a DOG BIRTHDAY PARTY!  Our friends' dog, Faith, was turning 9.  So, we attended Faith's birthday, with our dogs in tow, and had a great time!  I finally just printed the photos and scrapped the event.  I used so me Denami Designs paper, a bubble border punch, and the new Stampin' Up Pennant punch.  The ink is SU Melon Mambo, and the twine is from Soiree. ~Hoppy Crafting!

Friday, July 22, 2011

Prima Flowers


When I say "Prima", do you imagine gorgeous dimensional flowers, leaves, branches, etc.?  That's what I usually think of!  This year at the Scrapbook Expo, there were some different Prima flowers to choose from.  Yes, you could still get their other vast, gorgeous selection, but these new ones are still dimensional, but made with plastic/acrylic.  I just HAD to get a *few* of them! ~Hoppy Crafting!

Thursday, July 14, 2011

Some Pig!


The minute I saw the new Stampin' Up Catalog, I knew I just HAD to get the new stamp set "Button Buddies"!  There are cute images that coordinate with different sizes and shapes of buttons.  There's a snail, pumpkin, snowman, baby rattle, flower, cherries, a vase with flowers, and, the MOST ADORABLE little piggie, ever! 
To make this card, I used a pink card base (folding on the left), and layered a wide brown strip of paper with pink and white twine wrapped on it to make a bow.  I used two different sizes of Spellbinders to create the scalloped circles.  The larger is cut on Kraft, and the smaller cut on white cardstock.  I stamped the pig in Melon Mambo, and also faux-stitched both circles with a coordinating marker.  I finished off the pig with blue eyes, and a button snout, and popped the pig circle off of the kraft one with dimensionals.  ~Hoppy Crafting! 

Sunday, June 12, 2011

Party Dress!


Yesterday,was the 6th birthday party for one of my students.  I happened to be available, and her mom has been a huge volunteer in my classroom this year, so I decided to accept her invite, and attend.  I had a fun time at her party...the kids played on the trampoline, big toy, and painted shirts.  Some even played teather-ball, and there was a swimming pool (but the weather just wasn't quite warm enough yet).  I made this party dress birthday card using a design inspired by a Stampin' Up card class I had previously attended. 
The technique is simple, really.  You cut a large scallop out of two-sided paper.  Cut out the "wings" from each side to curve in and make a dress shape.  Fold over the top scallops to create the ruffle at the top, and turn over, then glue the "wings" at the bottom to make the ruffle at the bottom.  I tied some sheer ribbon in the middle, and popped up the dress using foam dots.  I added dark pink paper for the background, which I ran through the dots embossing folder in the Big Shot, and gave the bottom some balance with a cream satin ribbon.  Finally, I stamped "Birthday Wishes" in Melon Mambo, and punched it from the SU oval, then scallop oval.  I also popped the sentiment using foam adhesive.  ~Hoppy Crafting!

Saturday, June 11, 2011

Vinyl, Pails, and Flowers, Oh, My!


Being a Kindergarten teacher, I am very fortunate to have some great parent volunteers that come to help with the kids, as well as prep for projects, facilitate reading groups, and pretty much any other job that helps keep our classroom running smoothly.  Without all of this extra help, I assure you that my job would be 10 times more challenging, AND, the kids who really need a ton of extra help would not be getting it as much....that's what happens when you put 24 kindergartner's (5, 6, and 7 year olds) in one room for only 2 1/2 hours a day.  These volunteers are vital! 
To show my appreciation for my consistent parent helpers this year, I found these adorable painted metal pots at a local craft store, planted them with subtle purple/white petunias, and covered the pots with vinyl sayings (bloom, inspire, smile). I used Gypsy Wanderings for "bloom, smile, and inspire," and cut them from black vinyl.   I also cut a small scalloped card from Wild Card, and stamped "Thanks so much..." on the front, then finished the inside with "...for helping us grow this year!".  I've been surprising each parent helper during this last week and a half of school, and each one has seemed to appreciate this gift.  I hope they truly know how much they have helped these kids grow!  ~Hoppy Crafting! 

Monday, May 30, 2011

Punches Galore

Ok, so I'm a LITTLE punch crazy....:o)  I love my punches, I just really hate all the space they take up.  I decided to organize some in clear shoe bags behind my craft cave's door.  I started with one shoe bag hanging from the door, which holds around twelve pairs of shoes, and quickly discovered that I could totally use another.  After a quick run back to the store, some drywall screws, and the addition of washers (to prevent the holes from sliding off of the screws), I mounted another shoe bag behind the door.  Voila!  I had double the space, and in a place that just goes completely unused otherwise!  I still have another shelf with the rest of my Martha Stewart punches and other various punches for easy access, but this works nicely to keep my punches organized and see what ones I have without sorting and moving them all.  Good luck on your organization!  ~Hoppy Crafting!

Wednesday, May 25, 2011

Blue Blooms

For today's card, I used the same "Bloomin' Beautiful" SU stamp set as for yesterday's purple hydrangea arrangement.  I also used the same techniques (watercolor pencils, blender pen, etc.).  ~Hoppy Crafting!

Tuesday, May 24, 2011

Hydrangea Blooms

I was totally in the mood to stamp and "color in" pictures today, so I used this gorgeous hydrangea arrangement from Stampin' Up's "Bloomin' Beautiful".  The image is stamped in black, but I used SU watercolor pencils and a blender pen to color in the arrangement.  I used the "bloom" sentiment from the same set, and stamped it on a SU punch, which I layered.  I also used the new SU brown/white twine to add some dimension behind the sentiment.  ~Hoppy Crafting!

Monday, May 23, 2011

Making A Difference

I just love the Stampin' Up "Flight of the Butterfly" set!  I used this set and coordinating butterfly punch, to create the sentiment and dimensional butterfly.  The sentiment reads: "One person can make such a difference and that person is you!".  I also used the "Bliss" set to create the background.  I tied a brown grosgrain ribbon on the left margin, and used two tones of green for the entire card.  ~Hoppy Crafting! 

Sunday, May 22, 2011

Live, Laugh, Love

I made this "live, laugh, love" card, using three different stamp sets.  The background was created, using the Stampin' Up "Bliss" set.  The sentiment is from "On Your Birthday", and the butterfly was stamped from "Flight of the Butterfly" and then punched out using a SU punch.  I used a green, blue, and brown color scheme.  I also added silver dots on the butterfly in the center of all the flowers with the Gelly Roll Clear Star pen, and a brown grosgrain ribbon down the left side.  ~Hoppy Crafting!